Render a VNC client in browser
Cloudflare can render a Virtual Network Computer (VNC) terminal in your browser without any client software or configuration required.
Administrators can use Cloudflare Tunnel to connect a VNC host to Cloudflare’s network. Using Cloudflare Access, you can apply Zero Trust policies to determine who can access your VNC server. Cloudflare’s network will then enforce the Zero Trust policies and, when a user is allowed, render the client in the browser.
🗺️ This walkthrough covers how to:
- Install and run a Cloudflare Tunnel on a Linux virtual machine
- Install and configure VNC on a Linux virtual machine
- Build a Zero Trust policy to determine who can reach the host
- Render the VNC server in your browser
⏲️ Time to complete:
10 minutes
Before you start
- Add a website to Cloudflare
- Enable Cloudflare Zero Trust on your account
- Connect your identity provider to Cloudflare Zero Trust
Configure VNC on your virtual machine
This section covers how to install a VNC server with TightVNC and the Gnome User Interface. If you already have a VNC server installed, you can skip this step.
Open a terminal window for your VM.
Run the following commands to install the VNC software.
$ sudo apt-get update$ sudo apt-get install gnome-core$ sudo apt install tightvncserver$ sudo apt-get install gnome-panel$ sudo apt-get install ubuntu-gnome-desktopOnce installed, you can create the VNC server instance with the following command:
$ sudo tightvncserver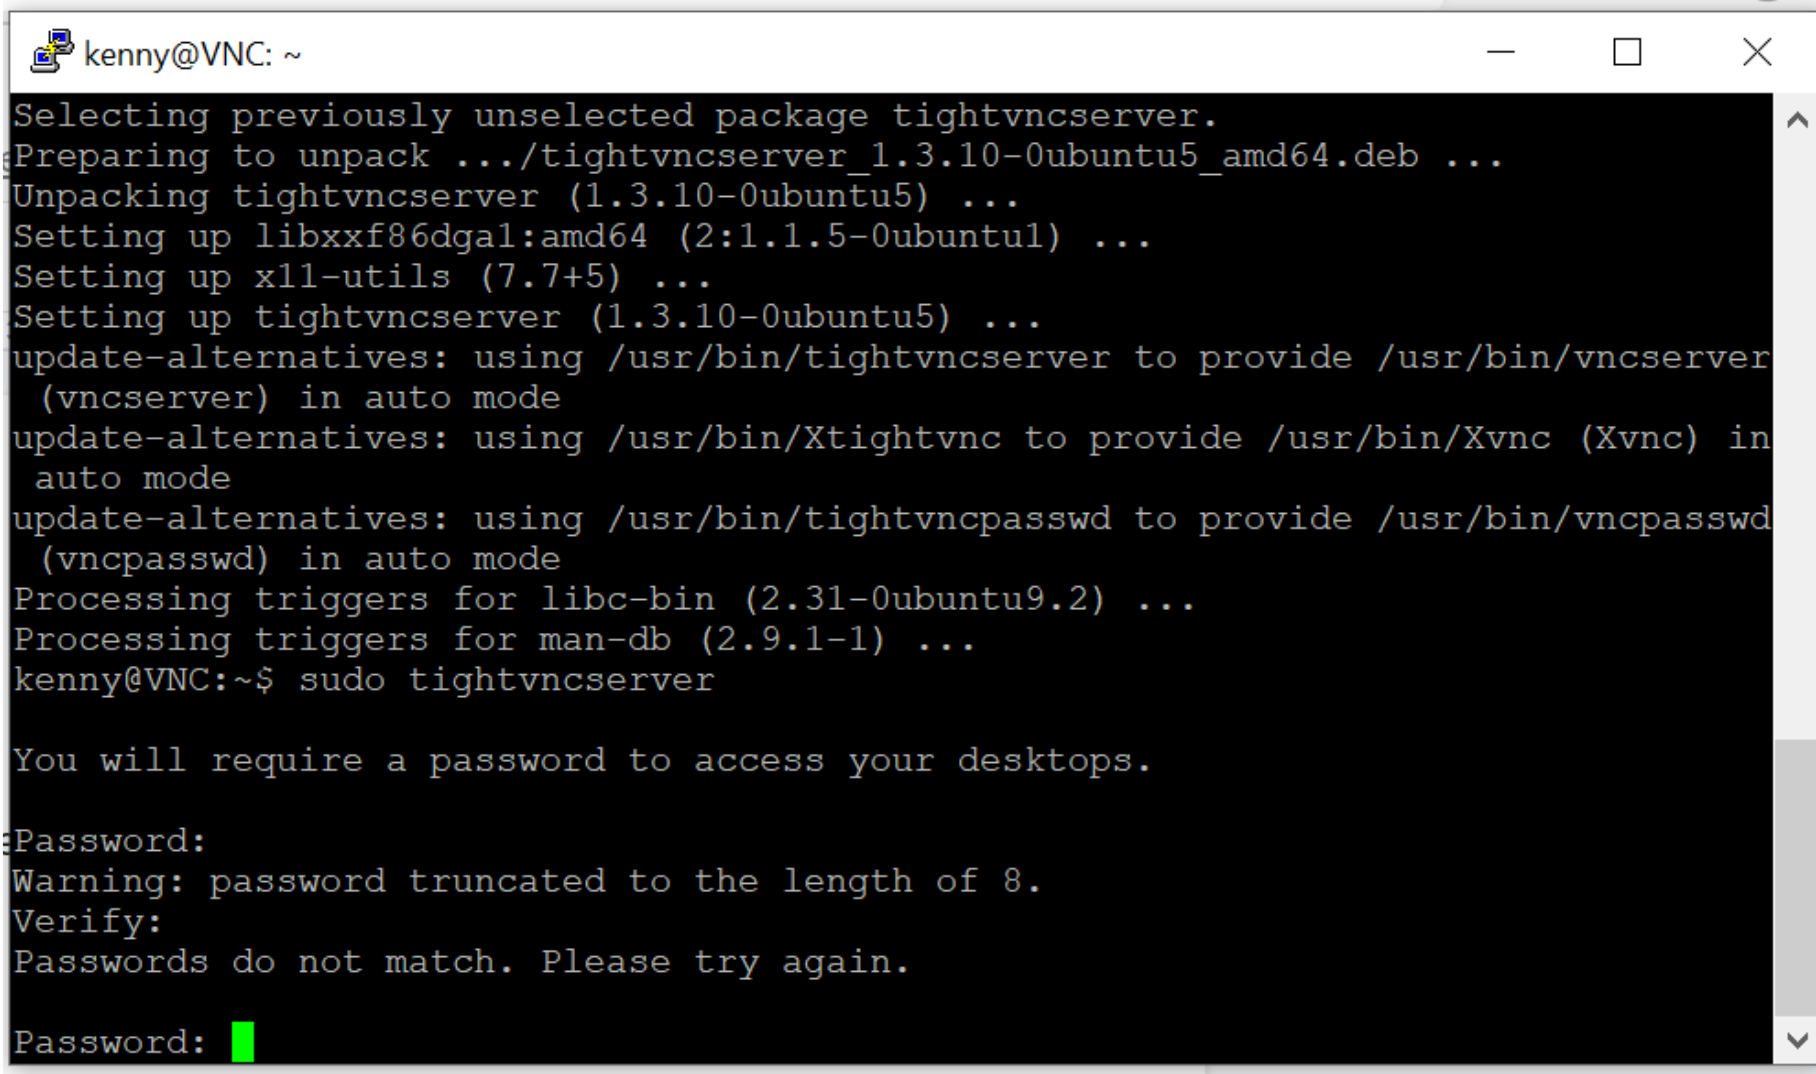
Select a password for the VNC server. This password will be used during login for your browser VNC server.
Run the following command, which will take you to your VNC server configuration directory.
$ cd .vncOpen your
xstartupfile.$ vim xstartupUpdate the file to the following configuration (this is for demonstration purposes, browser based VNC will work with most configurations):
xsetroot -solid greyx-terminal-emulator -geometry 80x24+10+10 -ls -title "$VNCDESKTOP Desktop" &#x-window-manager &# Fix to make GNOME workexport XKL_XMODMAP_DISABLE=1/etc/X11/Xsession#gnome-session &gnome-panel &nautilus &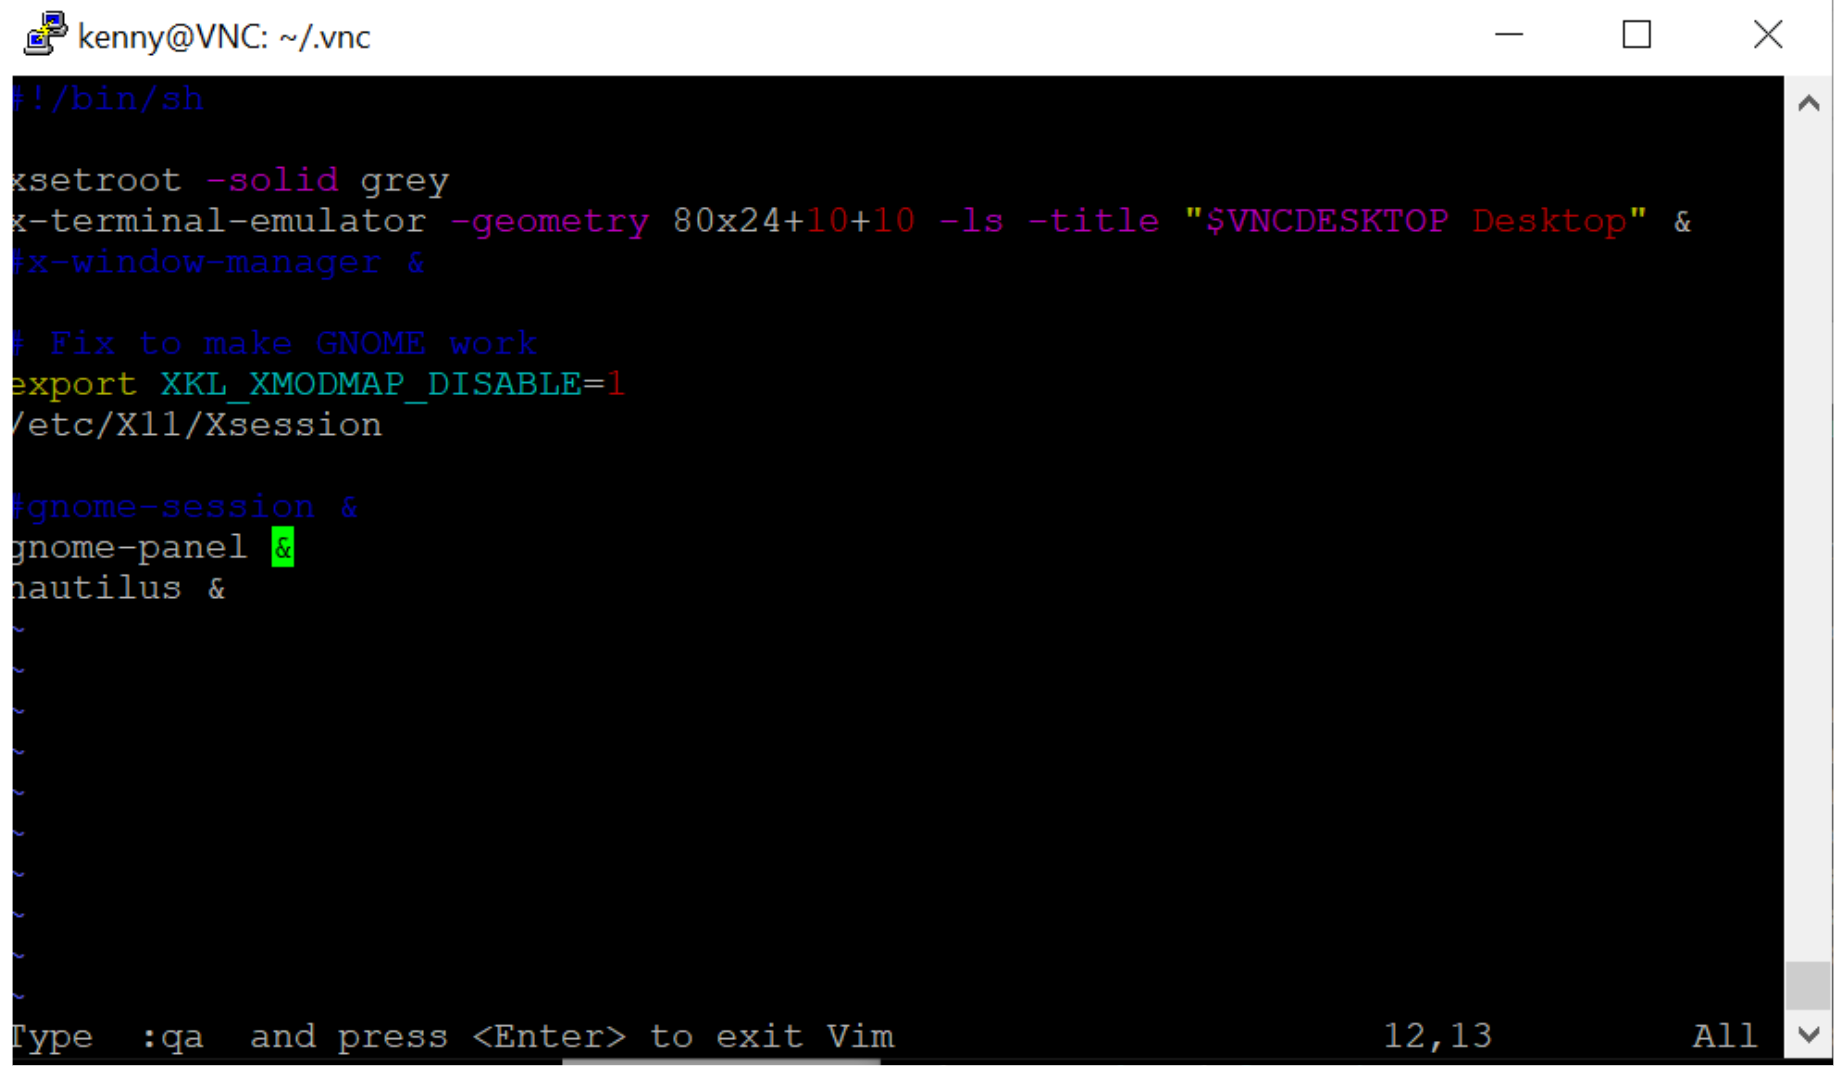
Run the following command to create your VNC server:
$ vncserver
At this point, you have a VNC server ready to test with browser-based VNC. We recommend performing a brief test with an existing VNC browser to verify any missing packages or configuration changes that might need to be made before continuing. Once your VNC server appears as desired, continue with your setup.
Configure Cloudflare Tunnel on your machine
Follow these instructions to install
cloudflaredAuthenticate
cloudflaredwith the command:$ cloudflared tunnel loginCreate a Tunnel with the command:
$ cloudflared tunnel create <NAME>Create a Tunnel configuration file with the command:
$ vim config.ymlAdd the following configuration to your configuration file.
tunnel: <NAME>ingress:- hostname: vnc.kennyatx.comservice: tcp://localhost:5901- service: http_status:404As you do that, replace the
hostnamevalue with the domain you wish to use to expose your VNC server in the browser. Also, replace5901with the port your VNC server is running on. To get a list of ports, runsudo ss -lnptand look forVNCto get the value that should be specified in your configuration file.Route your Tunnel to your website.
Run your Tunnel:
$ cloudflared tunnel --config path/config.yaml run <NAME>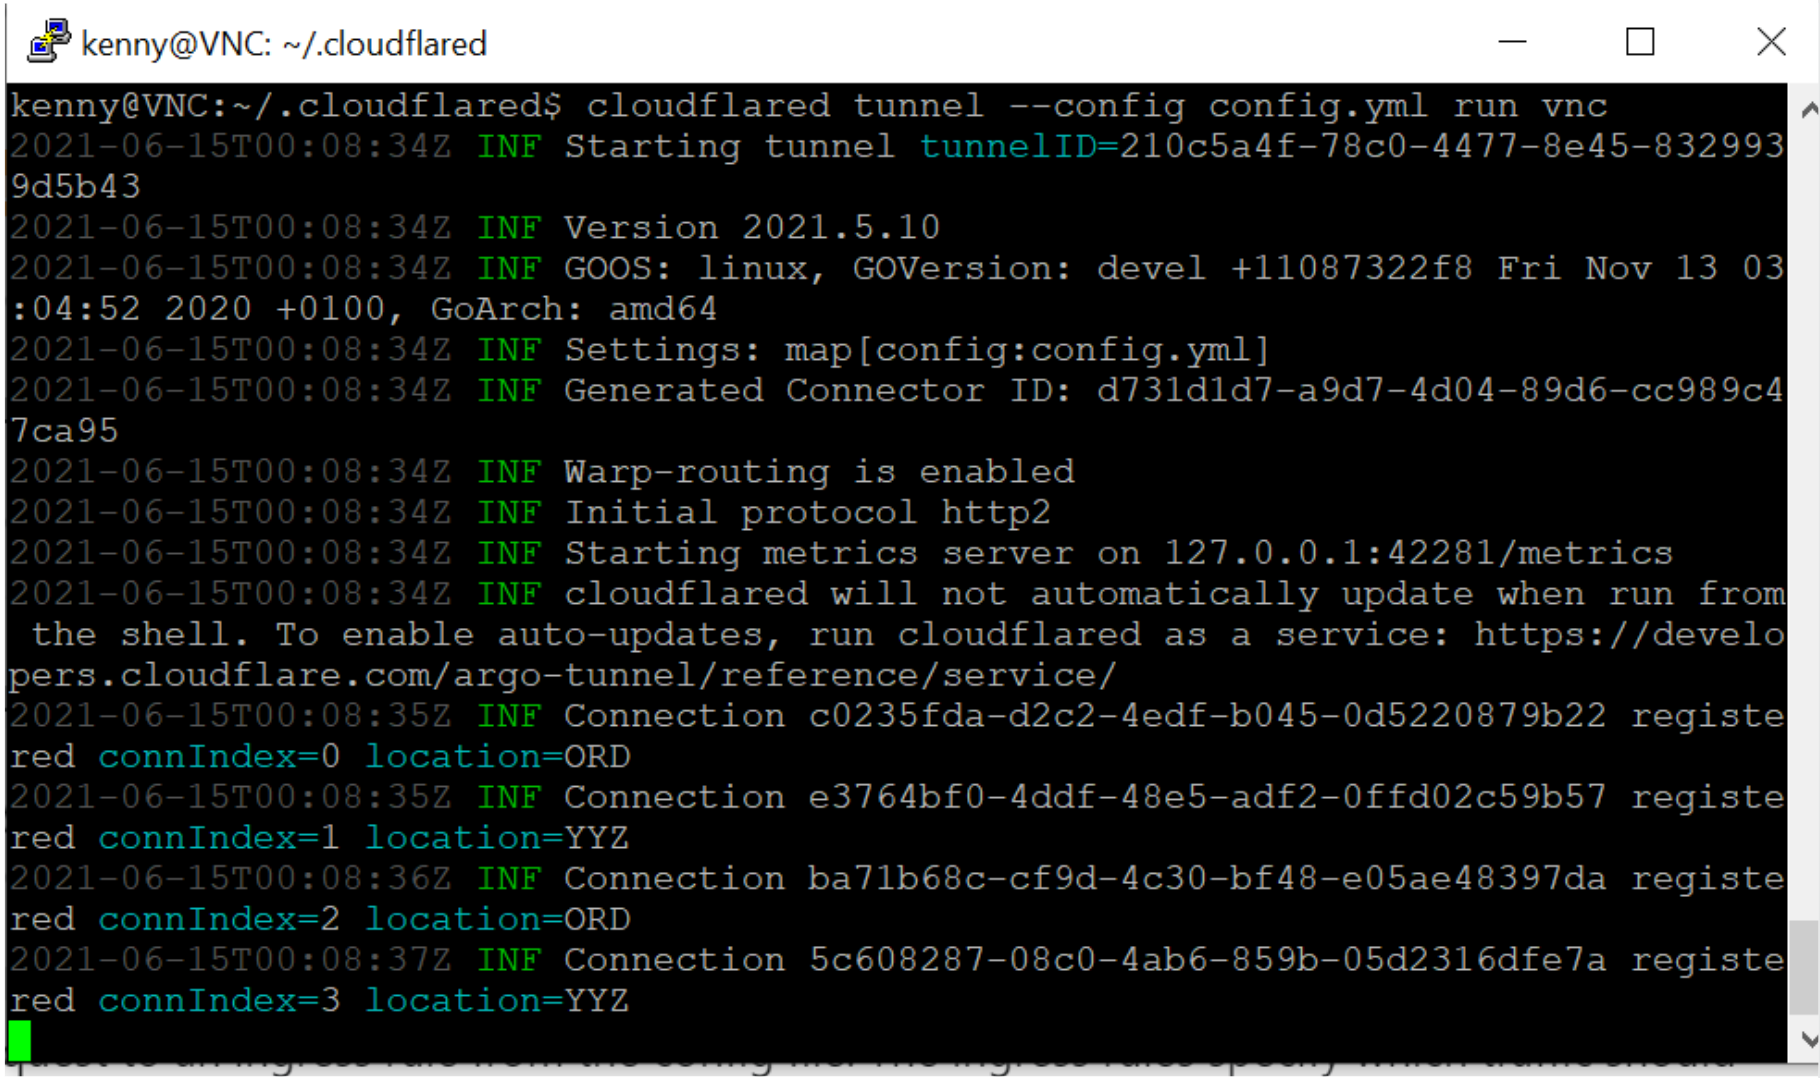
Follow this guide to open outbound connections for Cloudflare Tunnel if you have a firewall enabled.
At this point you have a running VNC server and a Cloudflare Tunnel on your machine ready to accept inbound VNC requests.
Create a Zero Trust VNC application
The last step is to create a Zero Trust application to run your VNC server in the Browser.
Open your Zero Trust Dashboard and go to the Access > Applications tab.
Click Add an application.
Select Self-hosted.
Name the application and set the domain to which you would like to expose the VNC server:

Add a Zero Trust policy. In this example we are only allowing users with emails ending in
@example.com.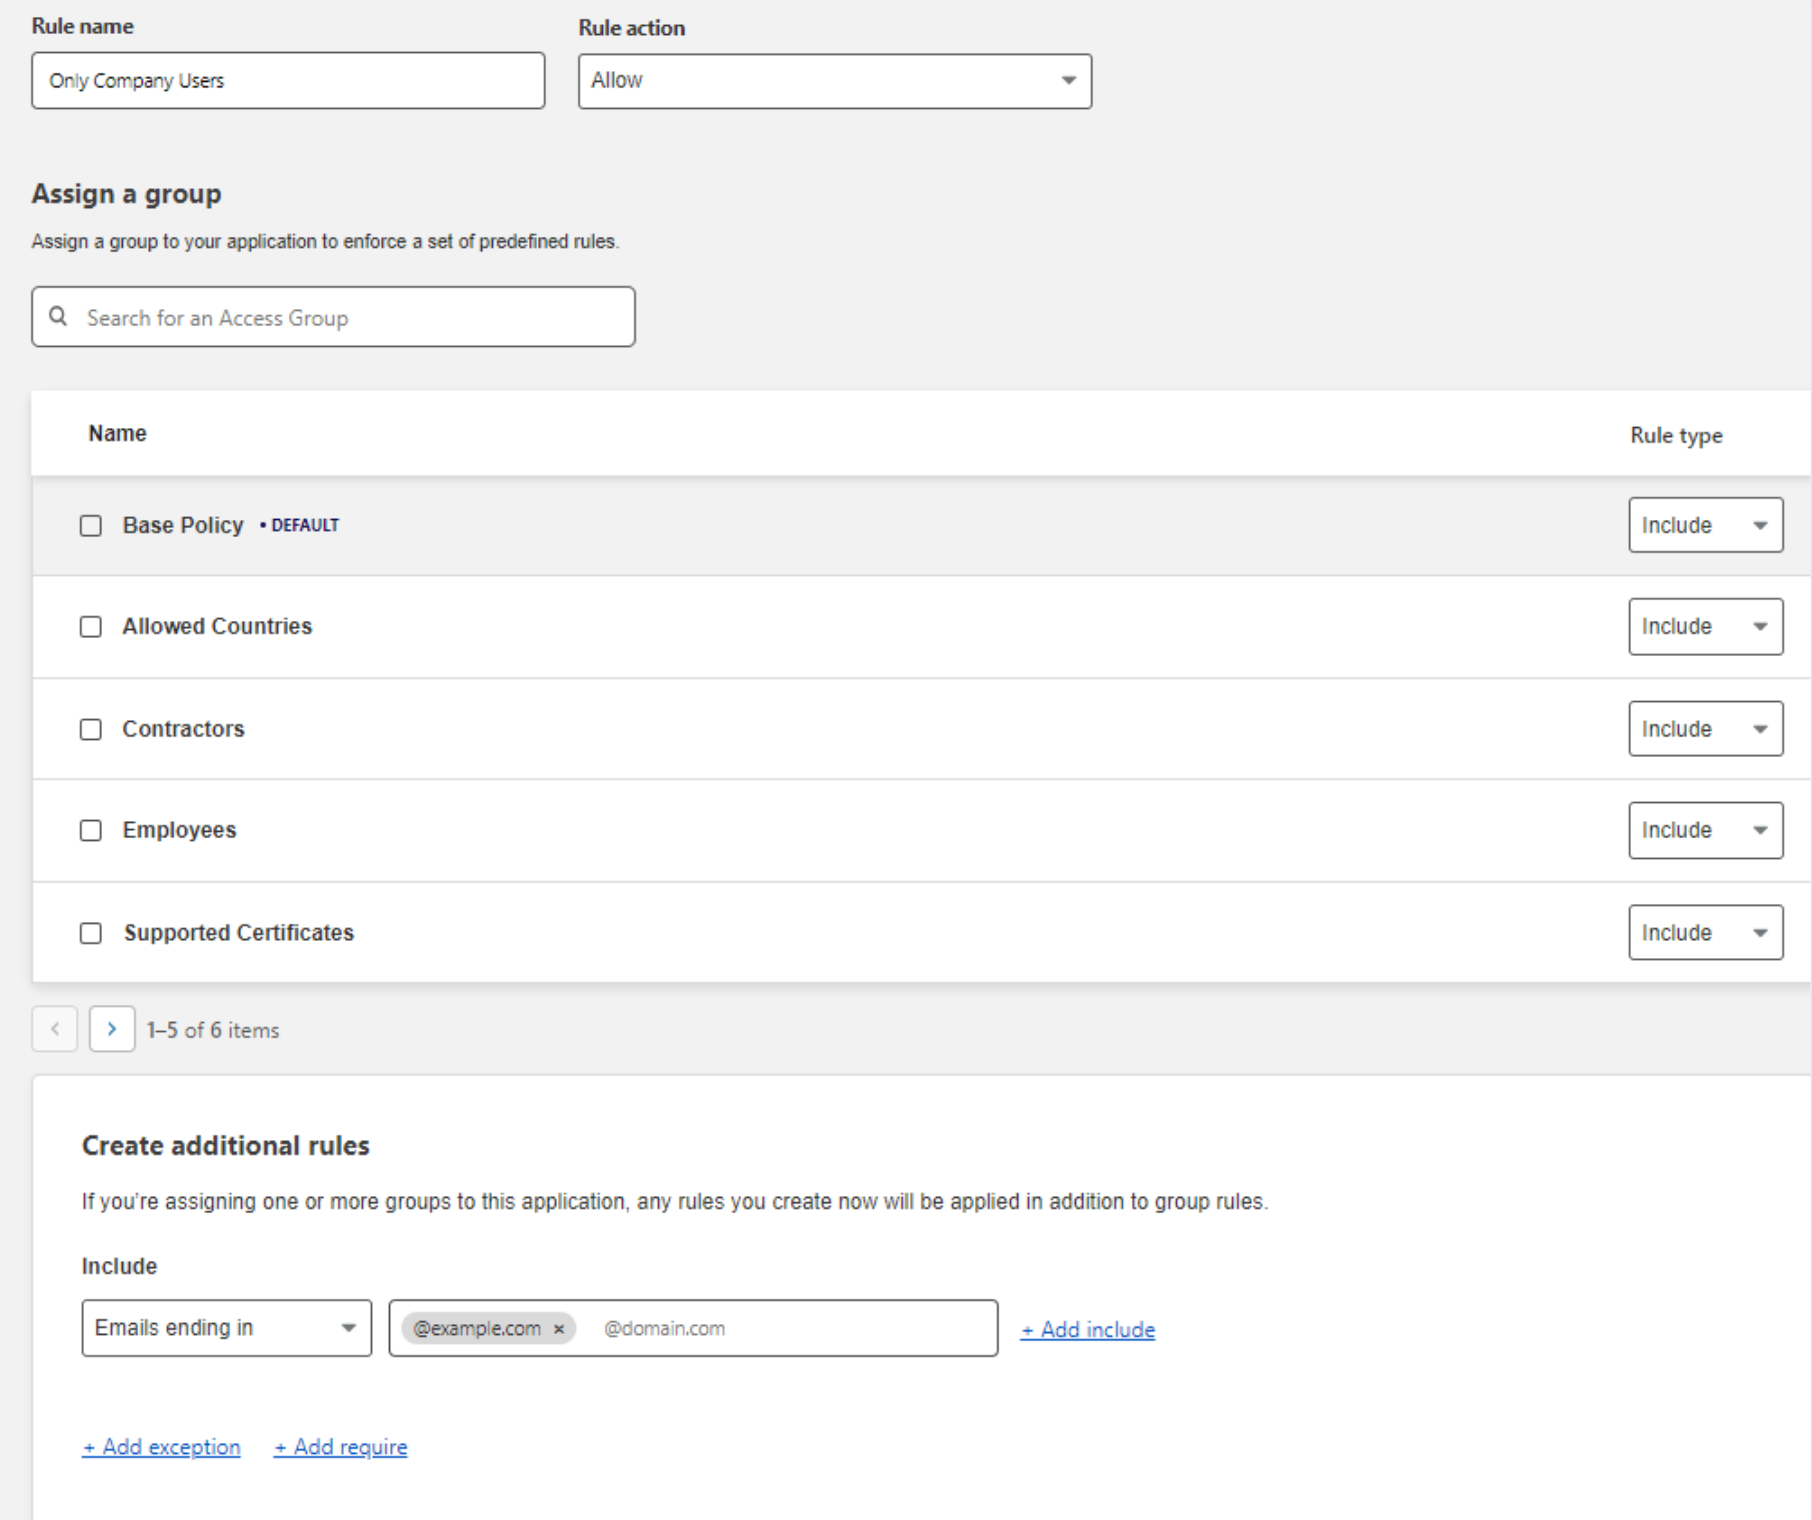
In
cloudflaredsettings, set Application Type to be VNC.
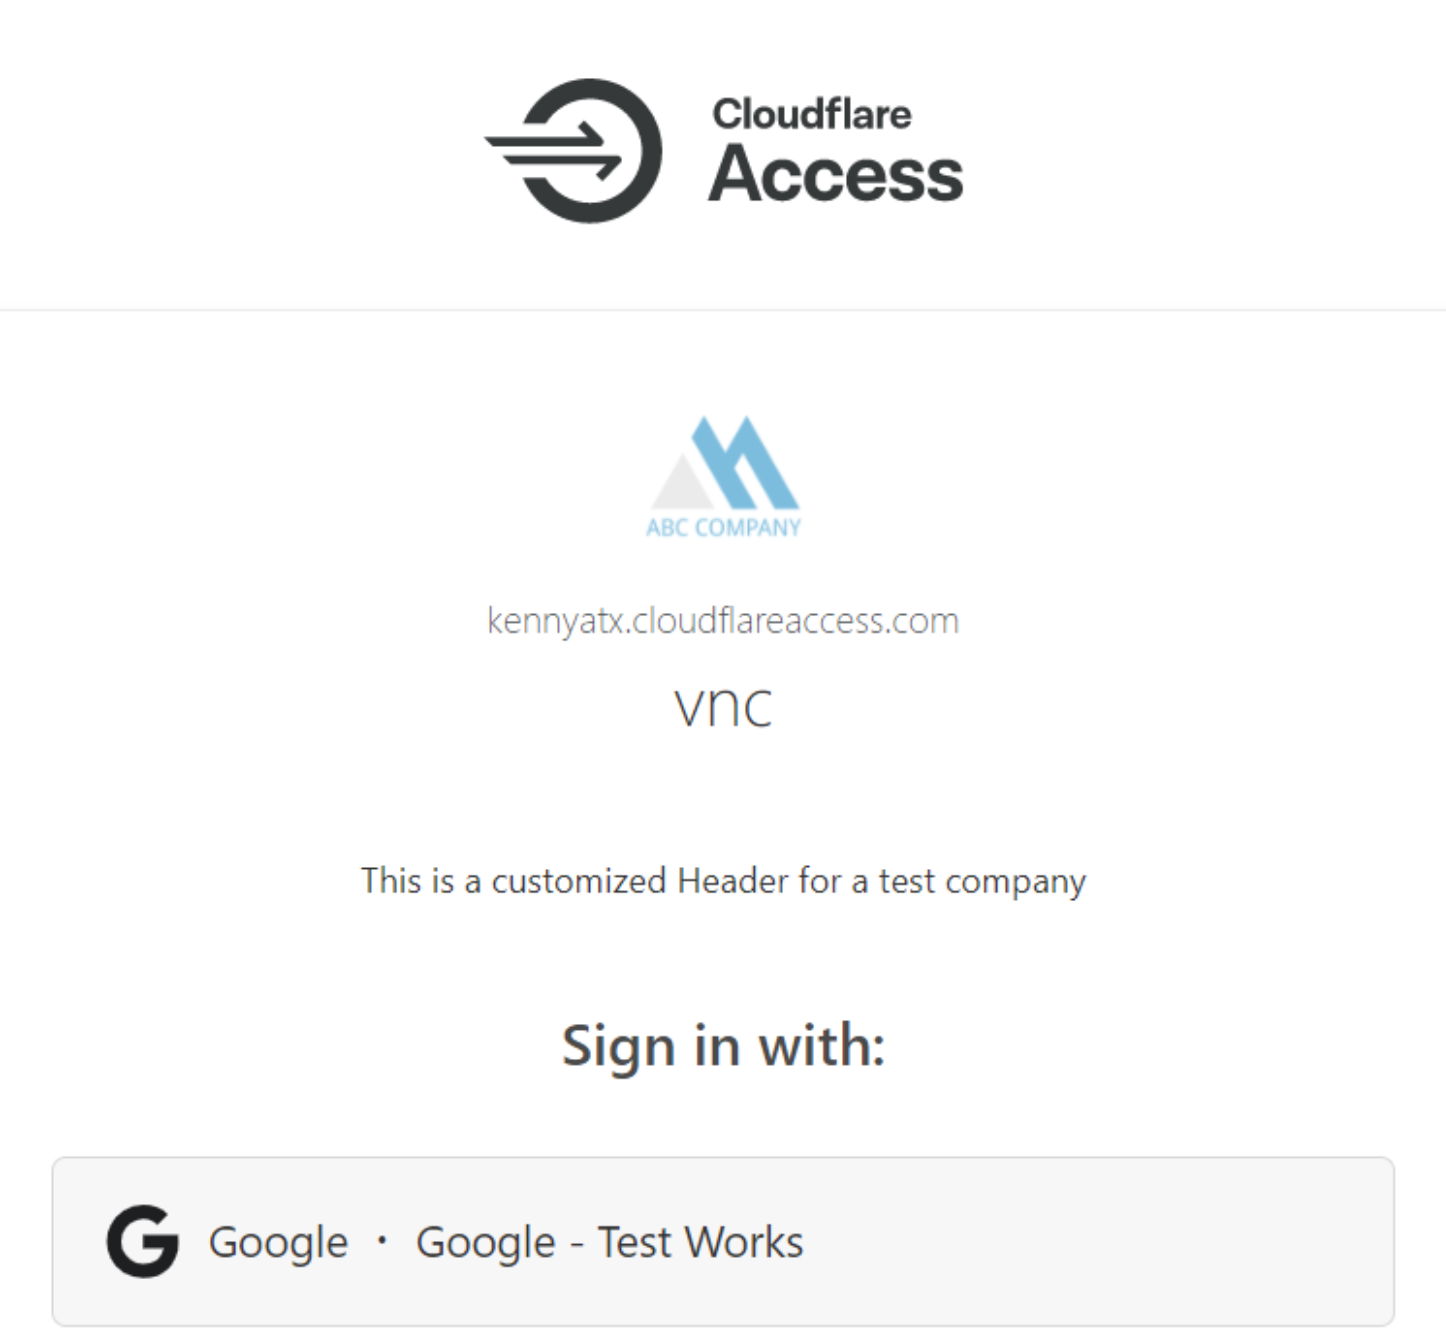
And now you are ready to use the VNC terminal directly in the browser. Users will first see a login screen with your configured identity providers:
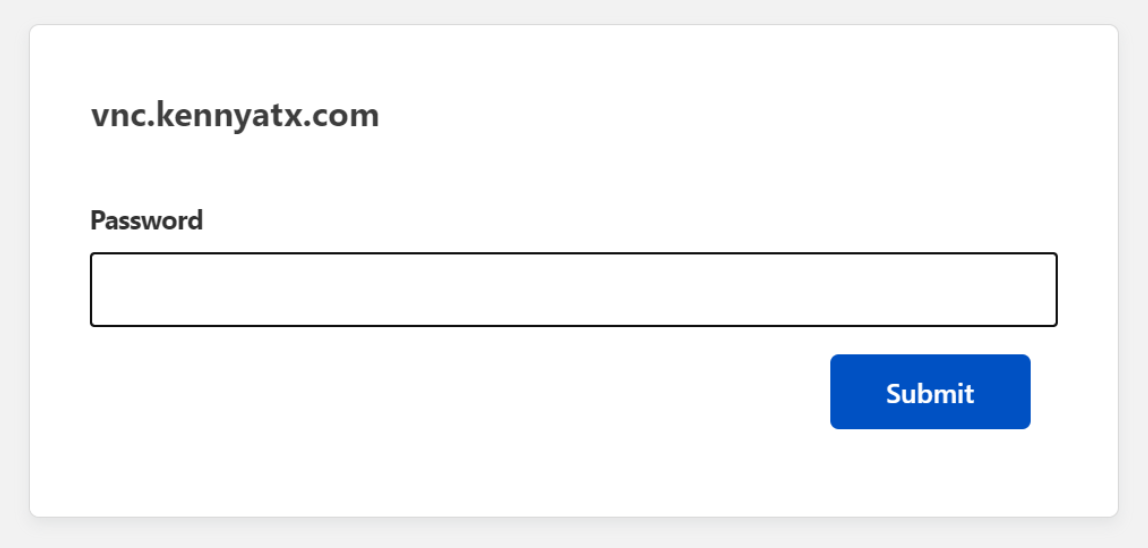
After successful authentication, they may be prompted to enter the VNC server’s password:
Then your user will be directed into your VNC server:
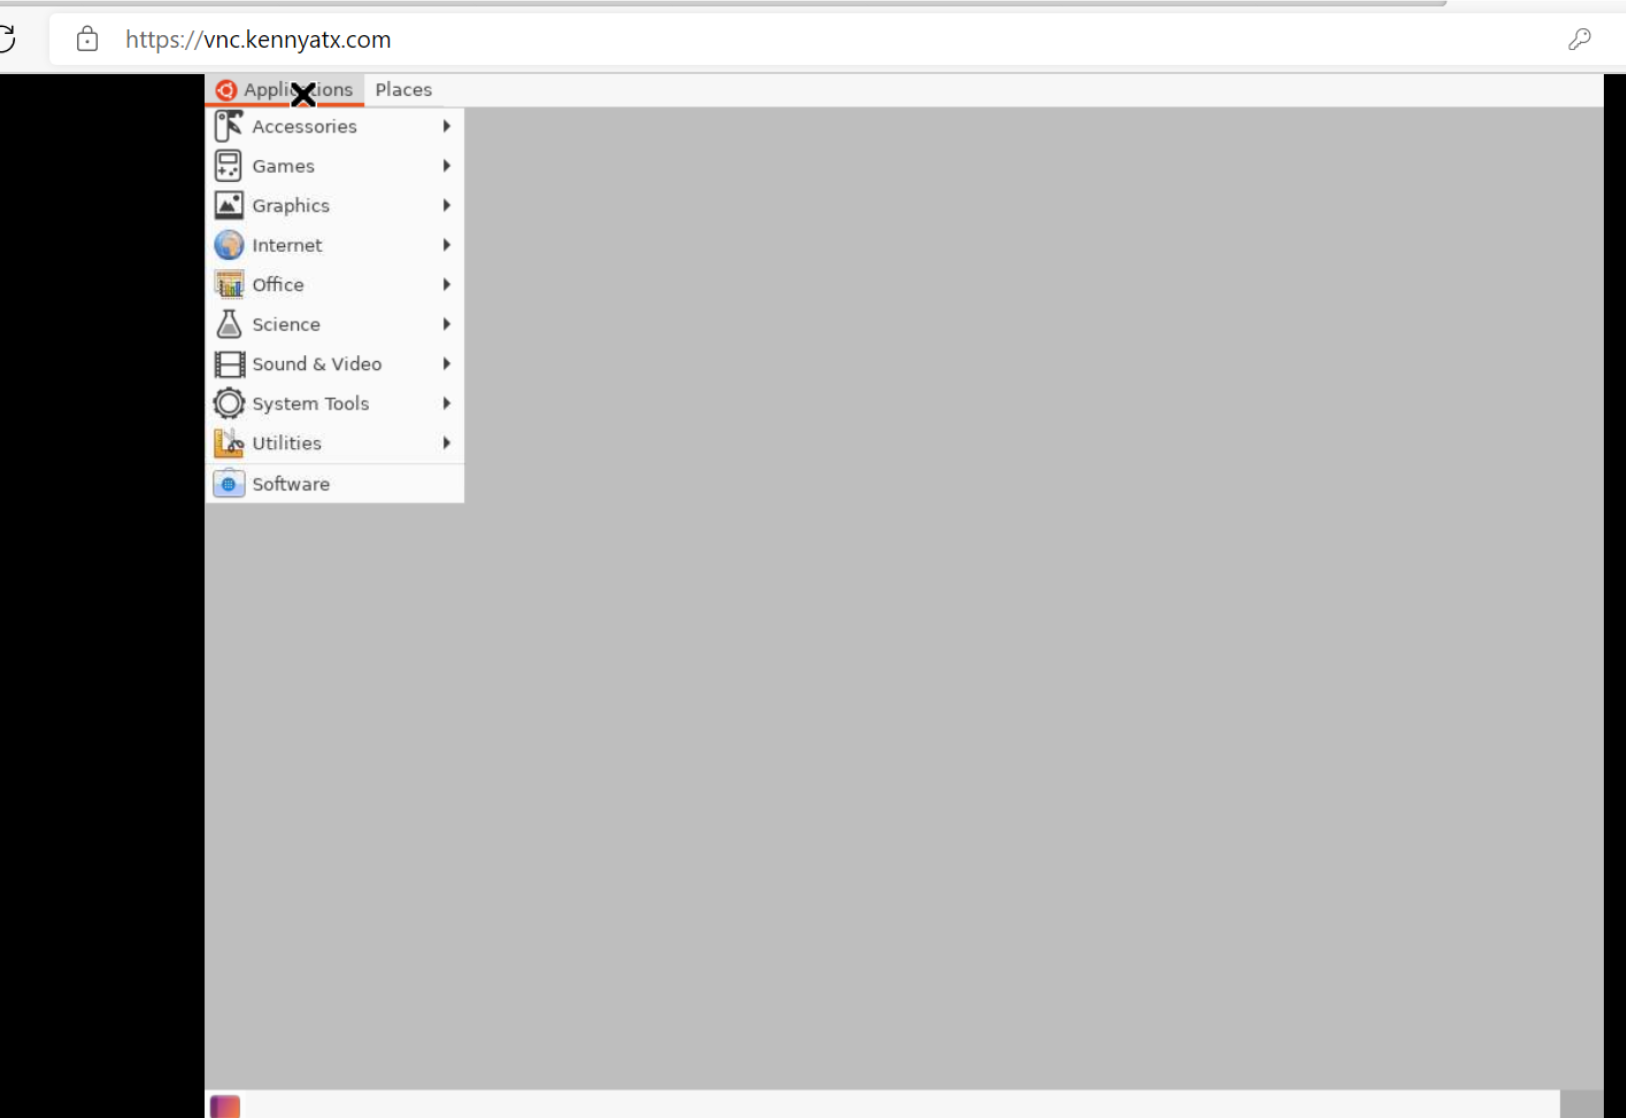
You’ve now successfully deployed a Zero Trust VNC server in the browser. You can define granular access controls across each individual VNC instance.